Building and Testing TypeScript Packages in Nx
In this tutorial, you'll learn how to create a new TypeScript monorepo using the Nx platform.
What will you learn?
- how to create a new TypeScript workspace with GitHub Actions preconfigured
- how to run a single task (i.e. build your packages) or run multiple tasks in parallel
- how to modularize your codebase with local libraries for better code organization
- how to benefit from caching that works both locally and in CI
- how to set up self-healing CI to apply fixes directly from your local editor
Prerequisite: Tutorial Setup
This tutorial requires a GitHub account to demonstrate the full value of Nx - including task running, caching, and CI integration.
Step 1: Creating a new Nx TypeScript workspace
Let's start by creating a new TypeScript monorepo with Nx Cloud and GitHub Actions preconfigured. You'll be guided through an interactive setup process to create your workspace. After completing the setup, return here to continue with this tutorial.
Create a new TypeScript monorepoWith Nx and GitHub Actions fully set up
Step 2: Verify Your Setup
Please verify closely that you have the following setup:
- A new Nx workspace on your local machine
- A corresponding GitHub repository for the workspace with a
.github/workflows/ci.ymlpipeline preconfigured - You completed the full Nx Cloud onboarding and you now have a Nx Cloud dashboard that is connected to your example repository on GitHub.
You should see your workspace in your Nx Cloud organization.
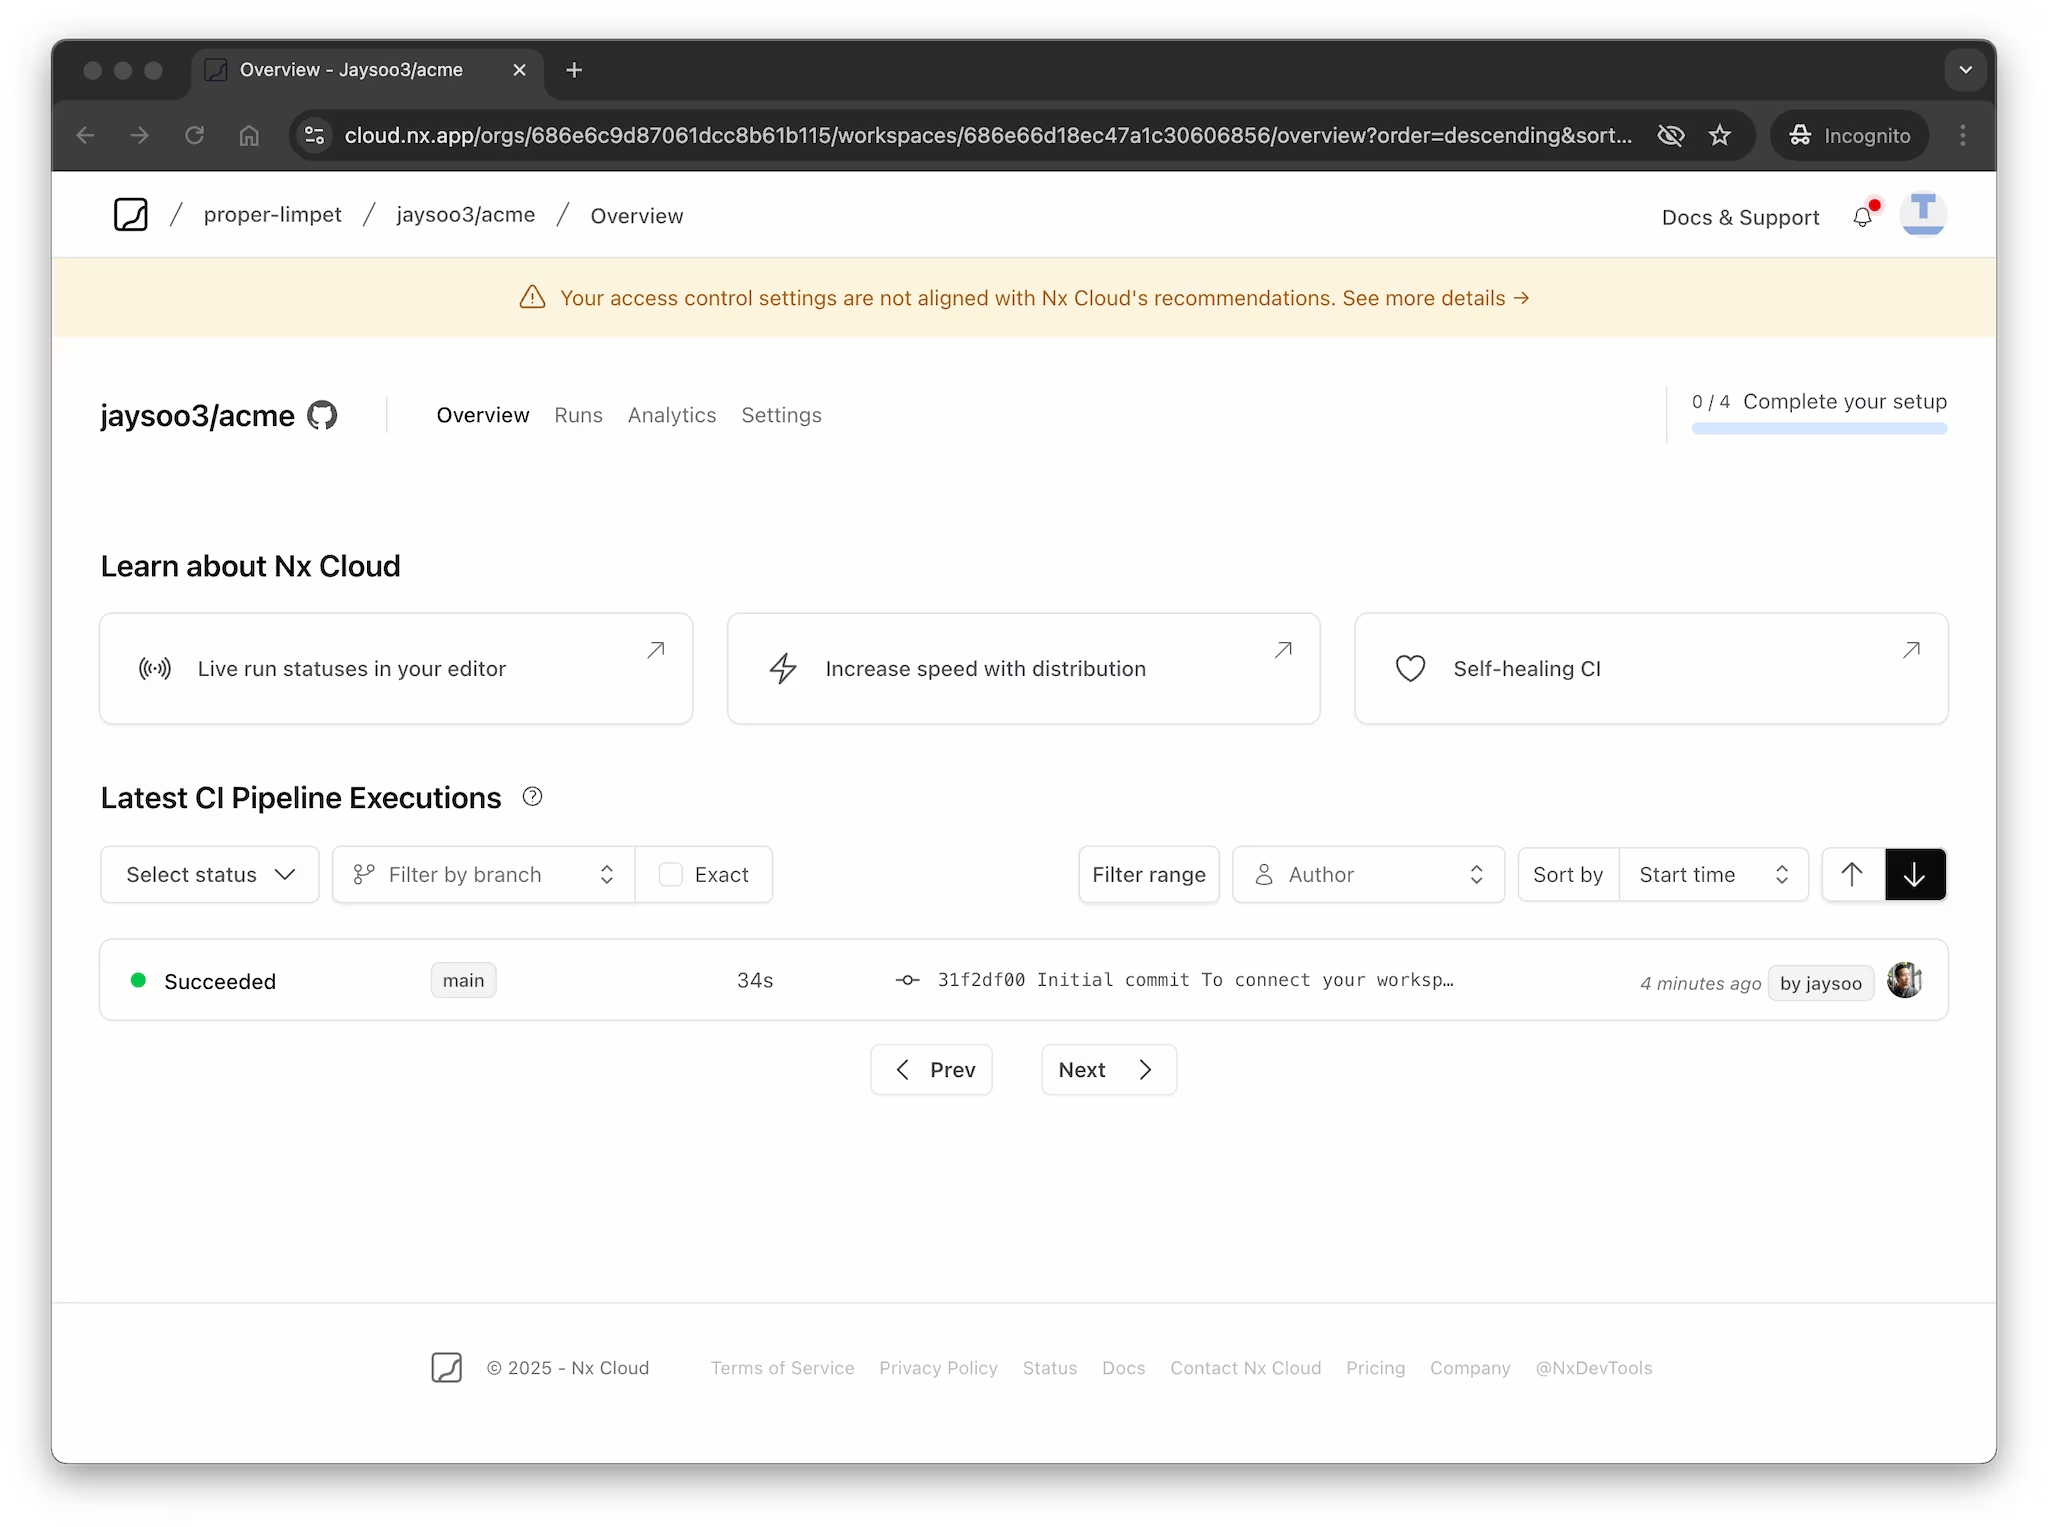
If you do not see your workspace in Nx Cloud then please follow the steps outlined in the Nx Cloud setup.
This is important for using remote caching and self-healing in CI later in the tutorial.
Explore the Nx Workspace Setup
Let's take a look at the structure of our new Nx workspace:
1acme
2├─ .github
3│  └─ workflows
4│     └─ ci.yml
5├─ .nx
6│  └─ ...
7├─ packages
8│  └─ .gitkeep
9├─ README.md
10├─ .prettierignore
11├─ .prettierrc
12├─ nx.json
13├─ package-lock.json
14├─ package.json
15├─ tsconfig.base.json
16└─ tsconfig.json
17
Here are some files that might jump to your eyes:
- The
.nxfolder is where Nx stores local metadata about your workspaces using the Nx Daemon. - The
nx.jsonfile contains configuration settings for Nx itself and global default settings that individual projects inherit. - The
.github/workflows/ci.ymlfile preconfigures your CI in GitHub Actions to run build and test through Nx.
Now, let's build some features and see how Nx helps get us to production faster.
Building TypeScript Packages
Let's create two TypeScript packages that demonstrate how to structure a TypeScript monorepo. We'll create an animal package and a zoo package where zoo depends on animal.
First, generate the animal package:
❯
npx nx g @nx/js:lib packages/animal --bundler=tsc --unitTestRunner=vitest --linter=none
Then generate the zoo package:
❯
npx nx g @nx/js:lib packages/zoo --bundler=tsc --unitTestRunner=vitest --linter=none
Running these commands should lead to new directories and files in your workspace:
1acme
2├── packages
3│   ├── animal
4│   └── zoo
5├── ...
6└── vitest.workspace.ts
7
Let's add some code to our packages. First, add the following code to the animal package:
1export function animal(): string {
2  return 'animal';
3}
4
5export interface Animal {
6  name: string;
7  sound: string;
8}
9
10const animals: Animal[] = [
11  { name: 'cow', sound: 'moo' },
12  { name: 'dog', sound: 'woof' },
13  { name: 'pig', sound: 'oink' },
14];
15
16export function getRandomAnimal(): Animal {
17  return animals[Math.floor(Math.random() * animals.length)];
18}
19
Now let's update the zoo package to use the animal package:
1import { getRandomAnimal } from '@acme/animal';
2
3export function zoo(): string {
4  const result = getRandomAnimal();
5  return `${result.name} says ${result.sound}!`;
6}
7
Also create an executable entry point for the zoo package:
1import { zoo } from './lib/zoo.js';
2
3console.log(zoo());
4
To build your packages, run:
❯
npx nx build animal
This creates a compiled version of your package in the dist/packages/animal folder. Since the zoo package depends on animal, building zoo will automatically build animal first:
❯
npx nx build zoo
You'll see both packages are built, with outputs in their respective dist folders. This is how you would prepare packages for use internally or for publishing to a package registry like NPM.
You can also run the zoo package to see it in action:
❯
node packages/zoo/dist/index.js
Nx uses the following syntax to run tasks:

Inferred Tasks
By default Nx simply runs your package.json scripts. However, you can also adopt Nx technology plugins that help abstract away some of the lower-level config and have Nx manage that. One such thing is to automatically identify tasks that can be run for your project from tooling configuration files such as package.json scripts and TypeScript configuration.
In nx.json there's already the @nx/js plugin registered which automatically identifies typecheck and build targets.
1{
2  ...
3  "plugins": [
4    {
5      "plugin": "@nx/js/typescript",
6      "options": {
7        "typecheck": {
8          "targetName": "typecheck"
9        },
10        "build": {
11          "targetName": "build",
12          "configName": "tsconfig.lib.json",
13          "buildDepsName": "build-deps",
14          "watchDepsName": "watch-deps"
15        }
16      }
17    }
18  ]
19}
20
21
To view the tasks that Nx has detected, look in the Nx Console project detail view or run:
❯
npx nx show project animal
@acme/animal
Root: packages/animal
Type:library
Targets
build
tsc --build tsconfig.lib.json
Cacheabletypecheck
tsc --build --emitDeclarationOnly
Cacheable
The @nx/js plugin automatically configures both the build and typecheck tasks based on your TypeScript configuration. Notice also how the outputs are set to {projectRoot}/dist - this is where your compiled TypeScript files will be placed, and it defined by the outDir option in packages/animal/tsconfig.lib.json.
You can override the options for inferred tasks by modifying the targetDefaults in nx.json or setting a value in your project.json file. Nx will merge the values from the inferred tasks with the values you define in targetDefaults and in your specific project's configuration.
Code Sharing with Local Libraries
When you develop packages, creating shared utilities that multiple packages can use is a common pattern. This approach offers several benefits:
- better separation of concerns
- better reusability
- more explicit APIs between different parts of your system
- better scalability in CI by enabling independent test/lint/build commands for each package
- most importantly: better caching because changes to one package don't invalidate the cache for unrelated packages
Create a Shared Utilities Library
Let's create a shared utilities library that both our existing packages can use:
❯
npx nx g @nx/js:library packages/util --bundler=tsc --unitTestRunner=vitest --linter=none
Now we have:
1acme
2├── packages
3│   ├── animal
4│   ├── util
5│   └── zoo
6└── ...
7
Let's add a utility function that our packages can share:
1export function util(): string {
2  return 'util';
3}
4
5export function formatMessage(prefix: string, message: string): string {
6  return `[${prefix}] ${message}`;
7}
8
9export function getRandomItem<T>(items: T[]): T {
10  return items[Math.floor(Math.random() * items.length)];
11}
12
Import the Shared Library
This allows us to easily import them into other packages. Let's update our animals package to use the shared utility:
1import { getRandomItem } from '@acme/util';
2
3export function animal(): string {
4  return 'animal';
5}
6
7export interface Animal {
8  name: string;
9  sound: string;
10}
11
12const animals: Animal[] = [
13  { name: 'cow', sound: 'moo' },
14  { name: 'dog', sound: 'woof' },
15  { name: 'pig', sound: 'oink' },
16];
17
18export function getRandomAnimal(): Animal {
19  return getRandomItem(animals);
20}
21
And update the zoo package to use the formatting utility:
1import { getRandomAnimal } from '@acme/animal';
2import { formatMessage } from '@acme/util';
3
4export function zoo(): string {
5  const result = getRandomAnimal();
6  const message = `${result.name} says ${result.sound}!`;
7  return formatMessage('ZOO', message);
8}
9
Now when you run npx nx build zoo, Nx will automatically build all the dependencies in the correct order: first util, then animal, and finally zoo.
Run the zoo package to see the updated output format:
❯
node packages/zoo/dist/index.js
Visualize your Project Structure
Nx automatically detects the dependencies between the various parts of your workspace and builds a project graph. This graph is used by Nx to perform various optimizations such as determining the correct order of execution when running tasks like npx nx build, enabling intelligent caching, and more. Interestingly, you can also visualize it.
Just run:
❯
npx nx graph
You should be able to see something similar to the following in your browser.
Let's create a git branch with our new packages so we can open a pull request later:
❯
git checkout -b add-zoo-packages
❯
git add .
❯
git commit -m 'add animal and zoo packages'
Building and Testing - Running Multiple Tasks
Our packages come with preconfigured building and testing . Let's intentionally introduce a typo in our test to demonstrate the self-healing CI feature later.
You can run tests for individual packages:
❯
npx nx build zoo
Or run multiple tasks in parallel across all packages:
❯
npx nx run-many -t build test
This is exactly what is configured in .github/workflows/ci.yml for the CI pipeline. The run-many command allows you to run multiple tasks across multiple projects in parallel, which is particularly useful in a monorepo setup.
There is a test failure for the zoo package due to the updated message. Don't worry about it for now, we'll fix it in a moment with the help of Nx Cloud's self-healing feature.
Local Task Cache
One thing to highlight is that Nx is able to cache the tasks you run.
Note that all of these targets are automatically cached by Nx. If you re-run a single one or all of them again, you'll see that the task completes immediately. In addition, there will be a note that a matching cache result was found and therefore the task was not run again.
~/acme❯
npx nx run-many -t built test
1      ✔  nx run @acme/util:build
2   ✔  nx run @acme/util:test
3   ✔  nx run @acme/animal:test
4   ✔  nx run @acme/animal:build
5   ✖  nx run @acme/zoo:test
6   ✔  nx run @acme/zoo:build
7
8——————————————————————————————————————————————————————————————————————————————————————————————————————————————————————————————————————————————————————————————————————————————————————————————————————————————————————————————————————————————————————————————
9
10 NX   Ran targets test, build for 3 projects (800ms)
11
12   ✔  5/6 succeeded [5 read from cache]
13
14   ✖  1/6 targets failed, including the following:
15
16      - nx run @acme/zoo:test
17
Not all tasks might be cacheable though. You can configure the cache settings in the targetDefaults property of the nx.json file. You can also learn more about how caching works.
Self-Healing CI with Nx Cloud
In this section, we'll explore how Nx Cloud can help your pull request get to green faster with self-healing CI. Recall that our zoo package has a test with a typo, so let's see how this can be automatically resolved.
The npx nx-cloud fix-ci command that is already included in your GitHub Actions workflow (github/workflows/ci.yml) is responsible for enabling self-healing CI and will automatically suggest fixes to your failing tasks.
1name: CI
2
3on:
4  push:
5    branches:
6      - main
7  pull_request:
8
9permissions:
10  actions: read
11  contents: read
12
13jobs:
14  main:
15    runs-on: ubuntu-latest
16    steps:
17      - uses: actions/checkout@v4
18        with:
19          filter: tree:0
20          fetch-depth: 0
21
22      - uses: actions/setup-node@v4
23        with:
24          node-version: 20
25          cache: 'npm'
26
27      - run: npm ci --legacy-peer-deps
28
29      - run: npx nx run-many -t lint test build
30
31      - run: npx nx-cloud fix-ci
32        if: always()
33
You will also need to install the Nx Console editor extension for VS Code, Cursor, or IntelliJ. For the complete AI setup guide, see our AI integration documentation.
Install Nx Console for VSCodeThe official VSCode extension for Nx.
Install Nx Console for JetBrainsAvailable for WebStorm, IntelliJ IDEA Ultimate and more!
Now, let's push the add-zoo-packages branch to GitHub and open a new pull request.
❯
git push origin add-zoo-packages
❯
# Don't forget to open a pull request on GitHub
As expected, the CI check may show failures or issues. But rather than looking at the pull request, Nx Console notifies you that the run has completed, and if there are any issues, it may have suggested fixes. This means that you don't have to waste time babysitting your PRs, and fixes can be applied directly from your editor.
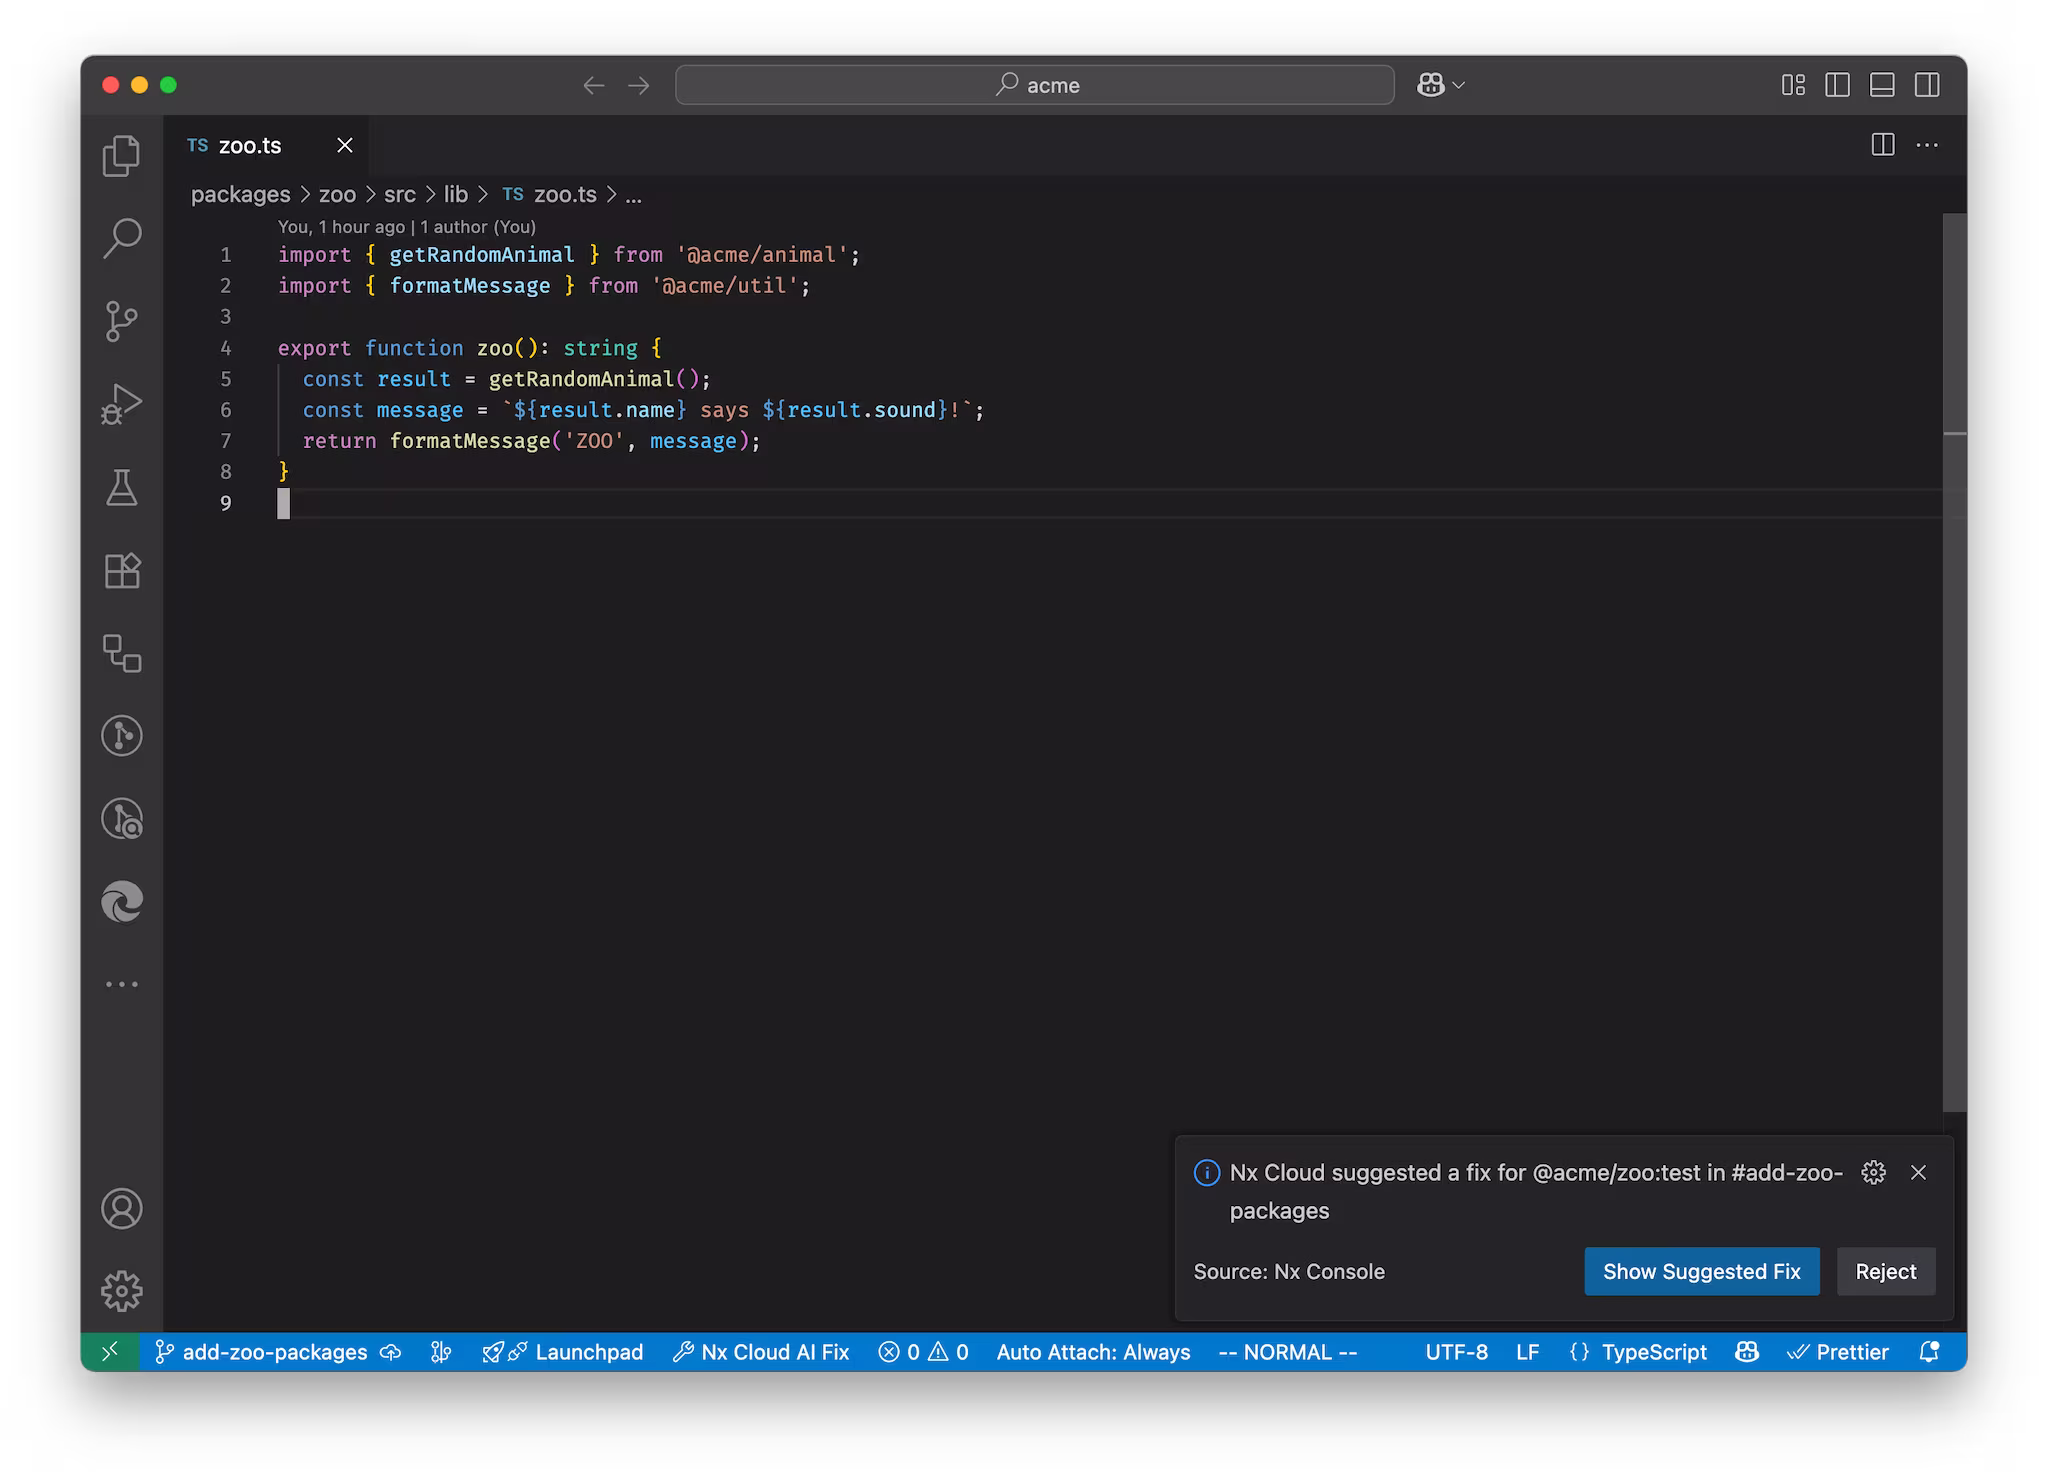
Fix CI from Your Editor
From the Nx Console notification, if there's a suggested fix (such as fixing the typo "formated" to "formatted"), you can click Show Suggested Fix button. Review the suggested fix and approve it by clicking Apply Fix.
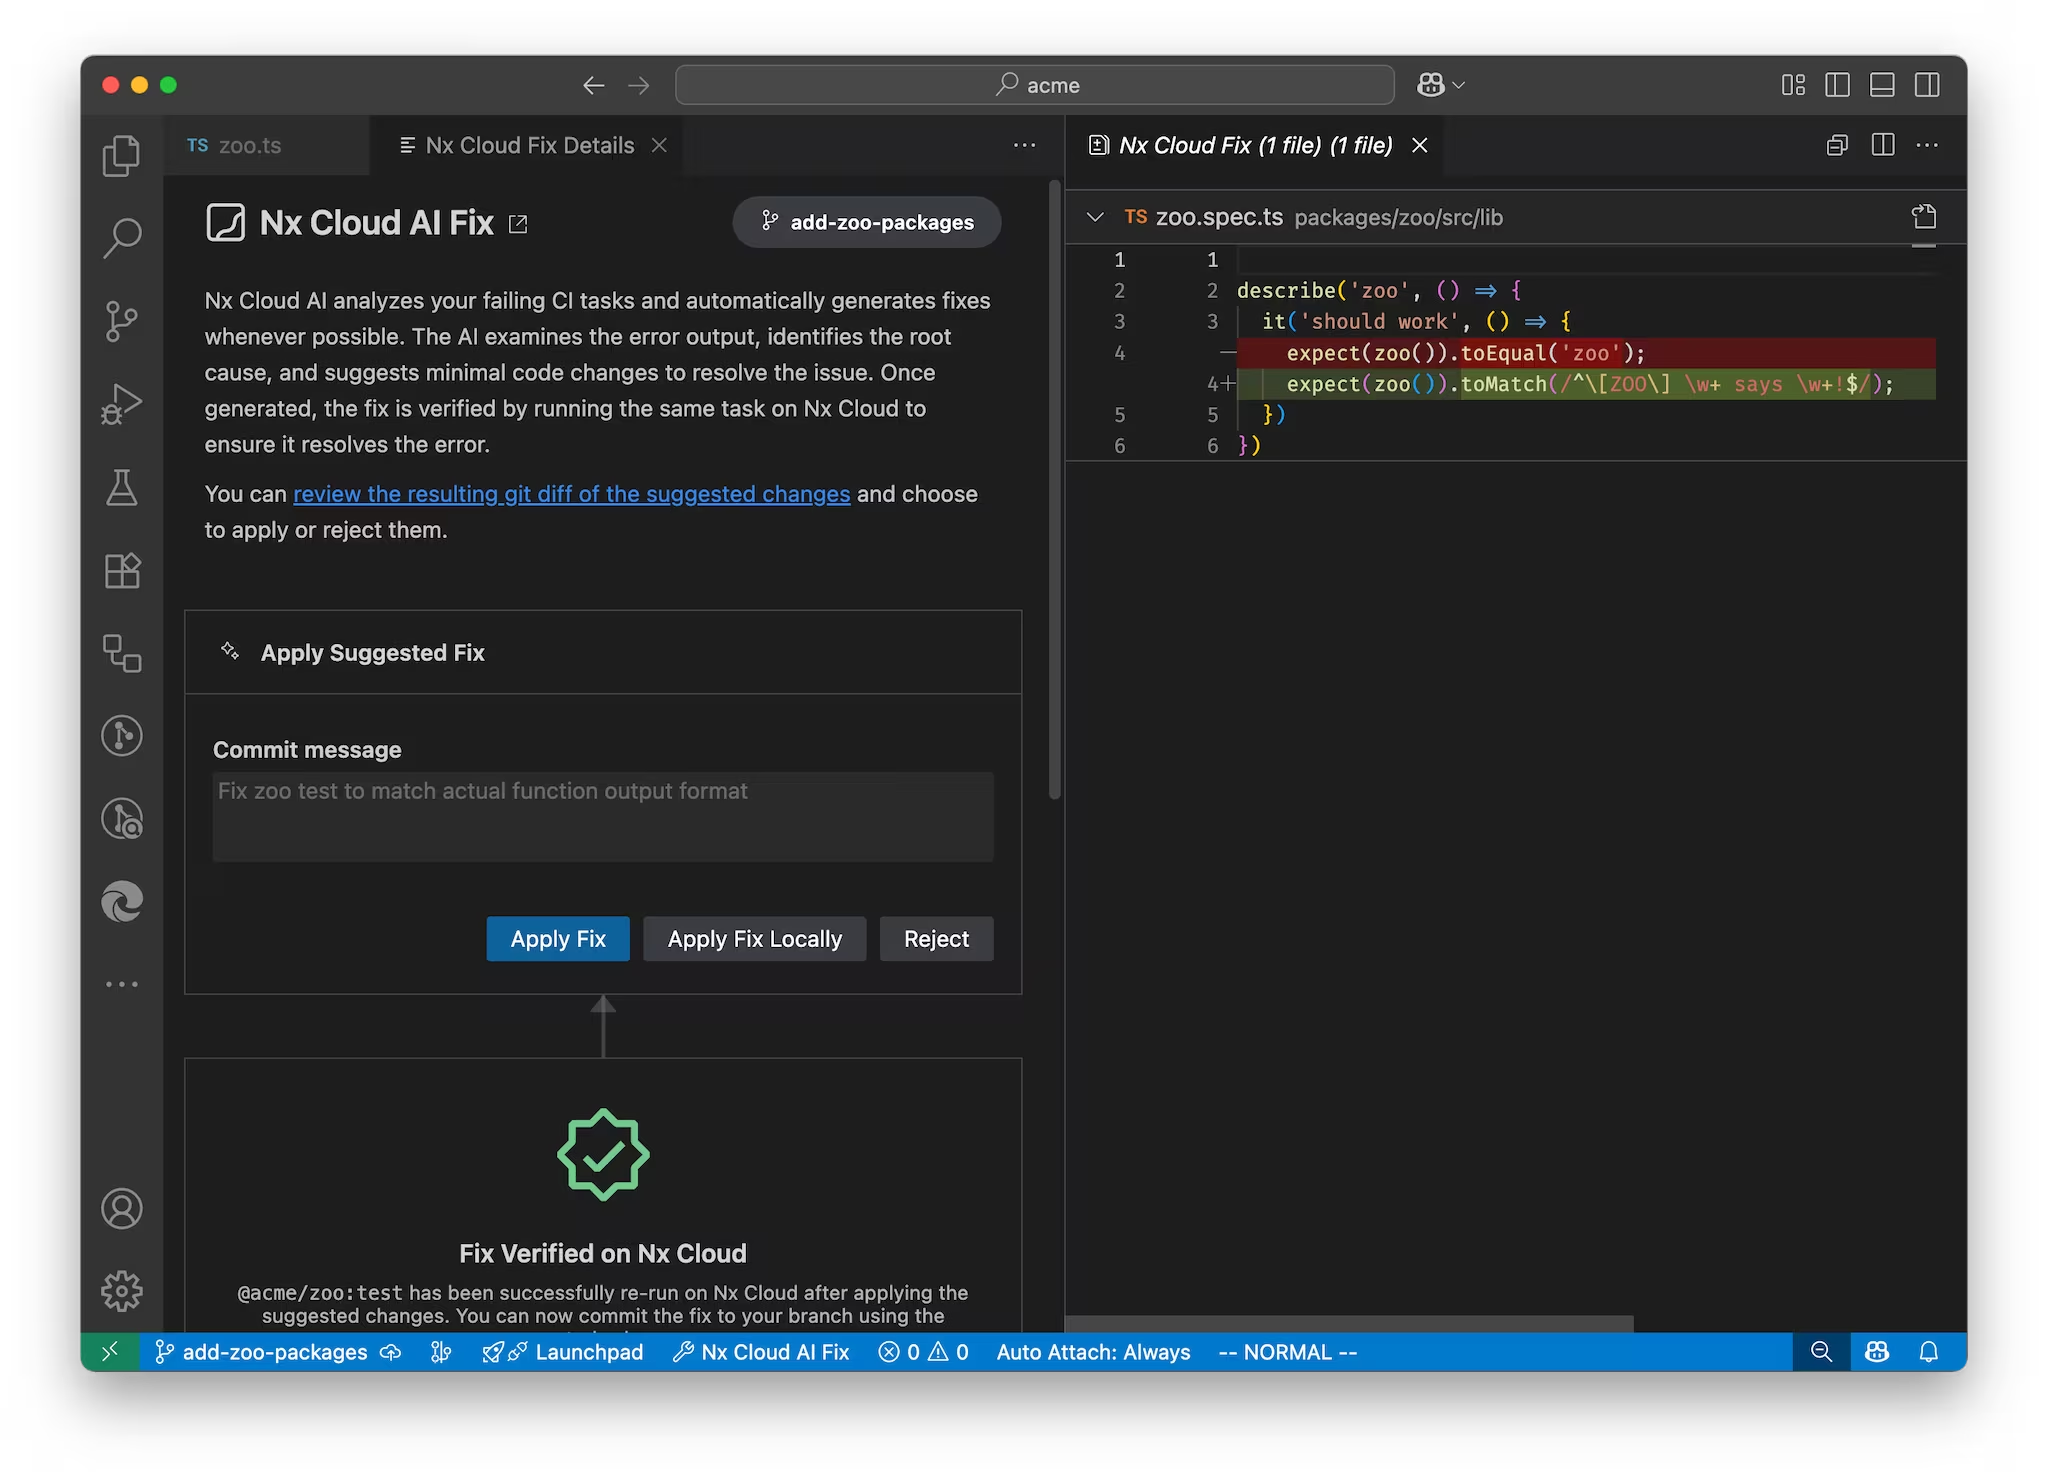
You didn't have to leave your editor or do any manual work to fix it. This is the power of self-healing CI with Nx Cloud.
Remote Cache for Faster Time To Green
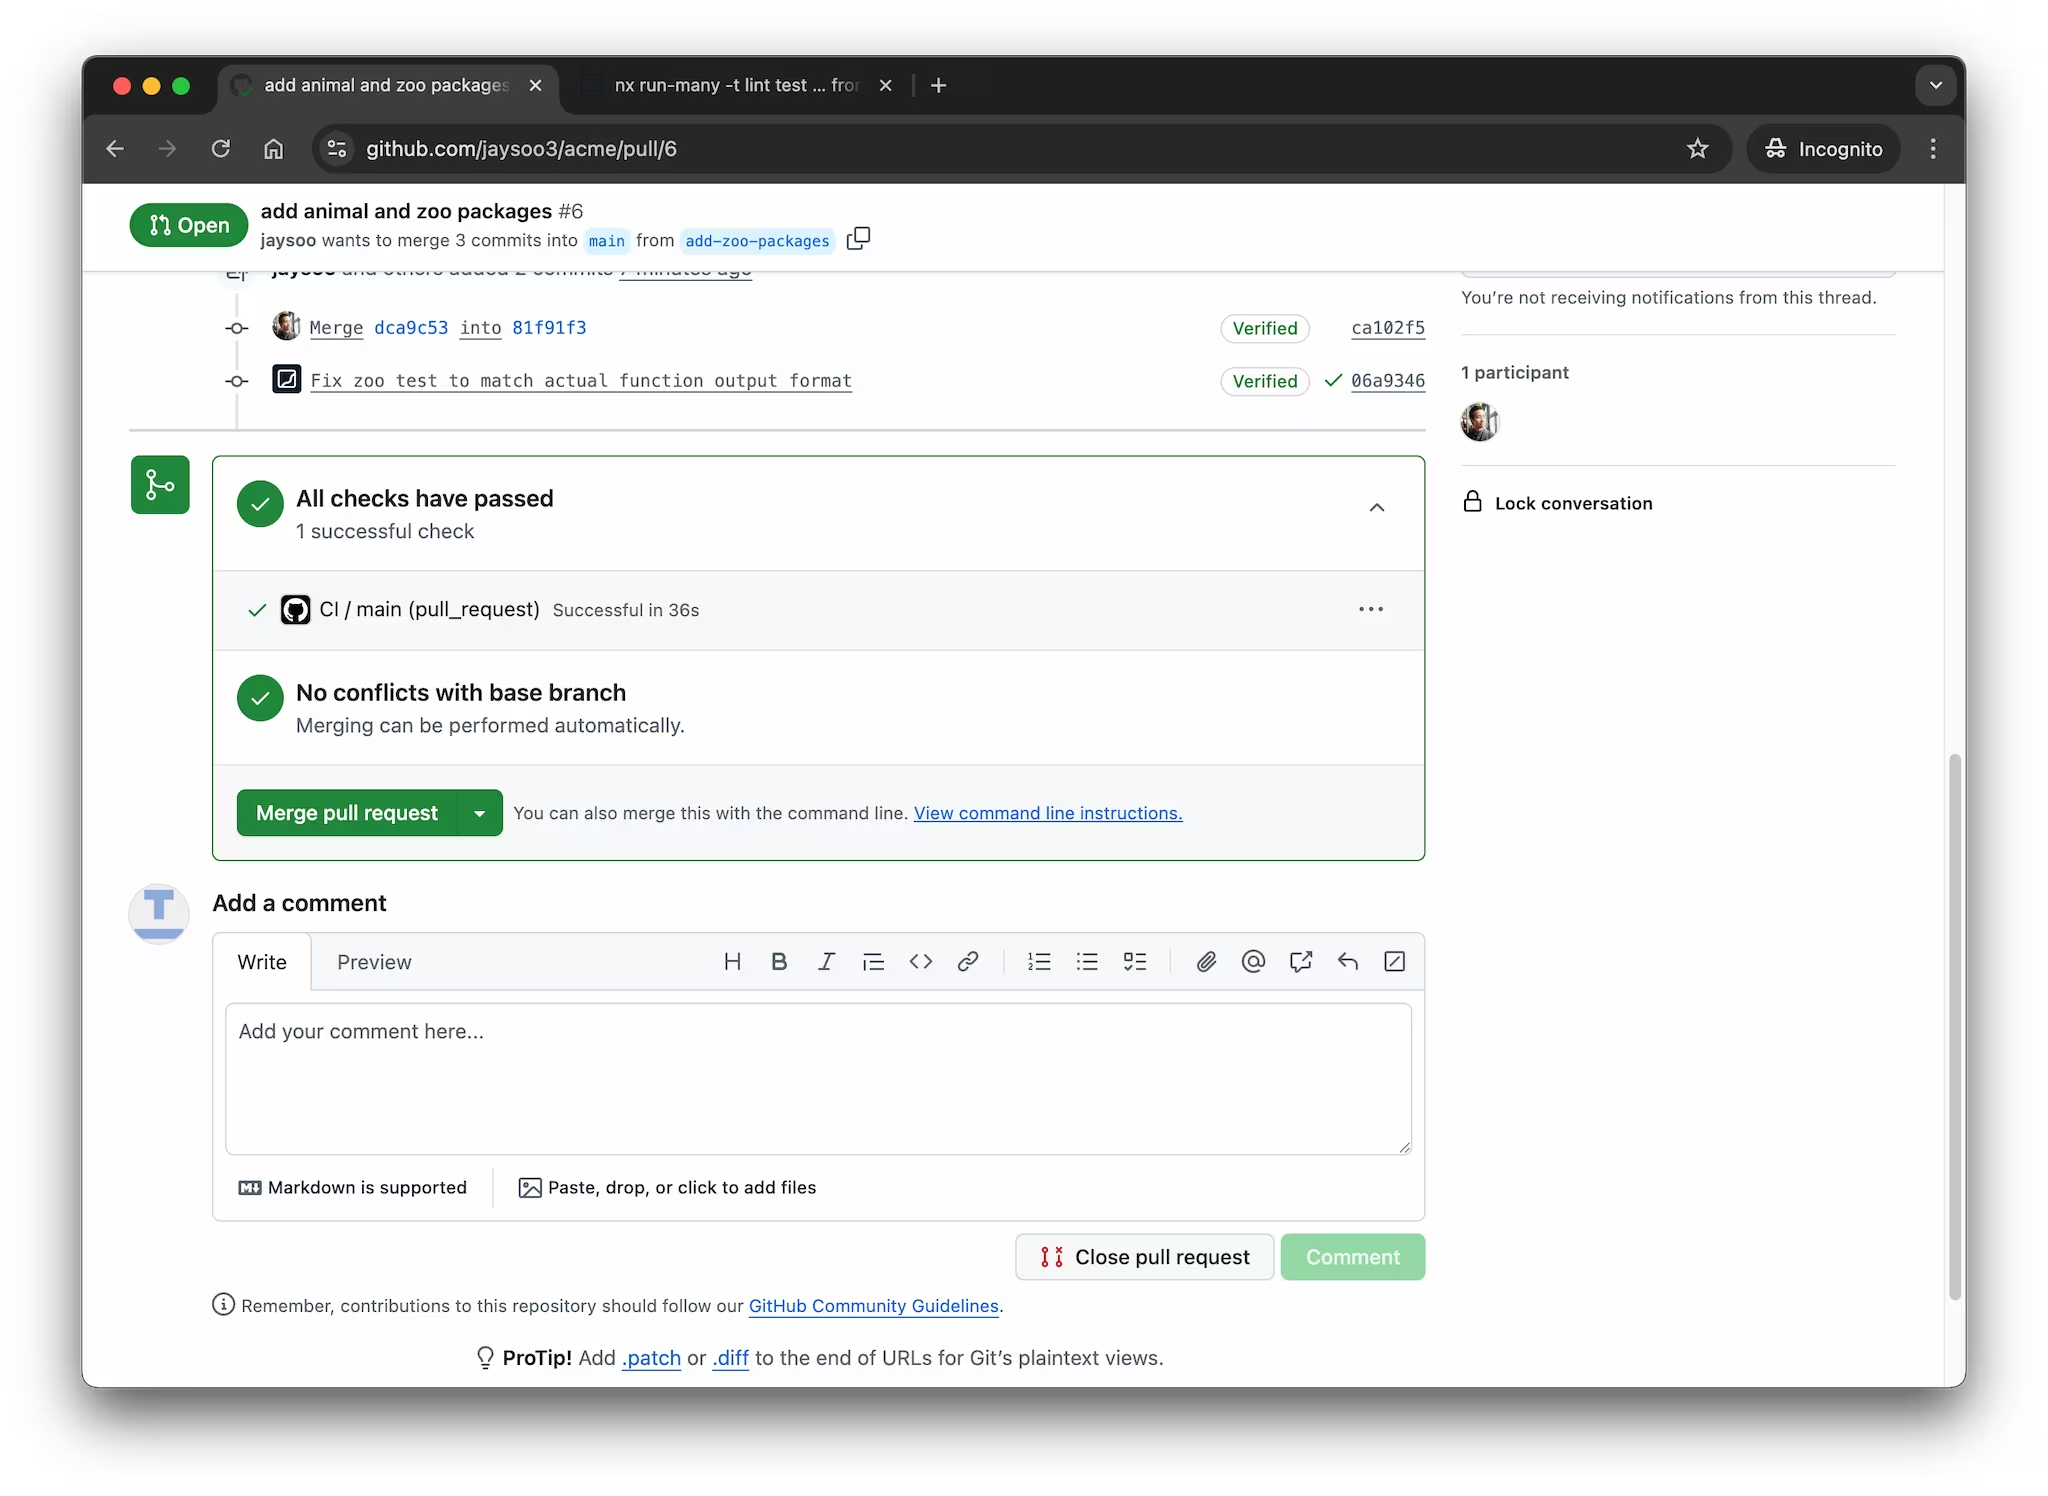
After the fix has been applied and committed, CI will re-run automatically, and you will be notified of the results in your editor.

When you click View Results to show the run in Nx Cloud, you'll notice something interesting. The tasks for packages that weren't affected by your change were read from remote cache and did not have to run again, thus each taking less than a second to complete.
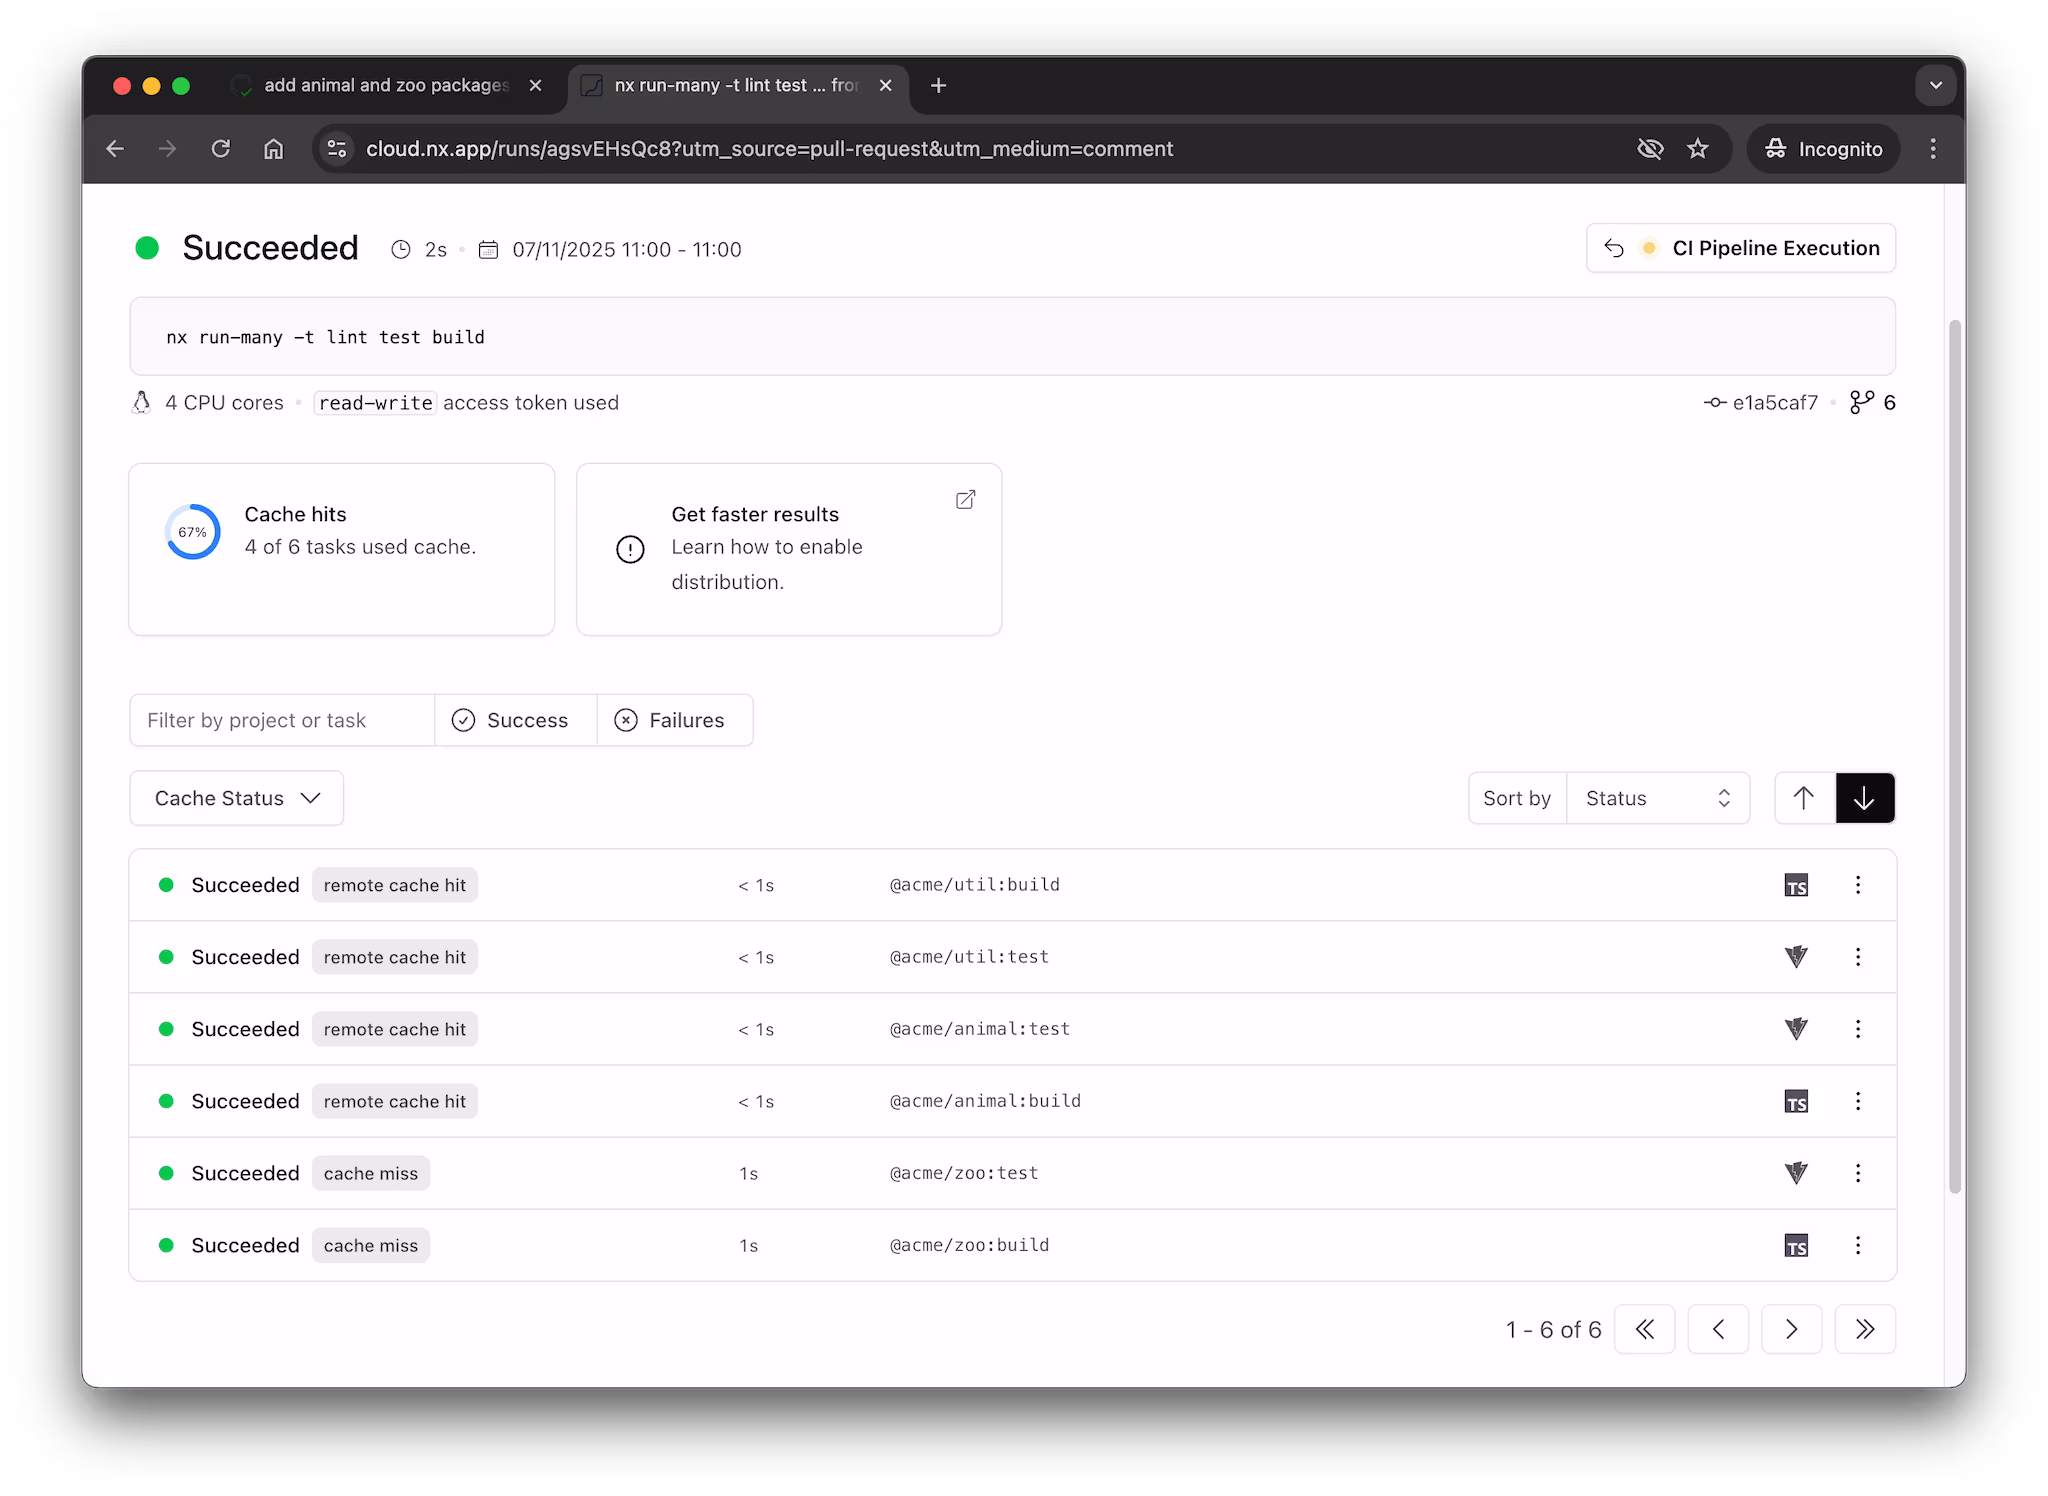
This happens because Nx Cloud caches the results of tasks and reuses them across different CI runs. As long as the inputs for each task have not changed (e.g. source code), then their results can be replayed from Nx Cloud's Remote Cache.
This significantly speeds up the time to green for your pull requests, because subsequent changes to them have a good chance to replay tasks from cache.
Outputs from cached tasks, such as the dist folder for builds or coverage folder for tests, are also read from cache. Even though a task was not run again, its outputs are available. The Cache Task Results page provides more details on caching.
This pull request is now ready to be merged with the help of Nx Cloud's self-healing CI and remote caching.
The next section deals with publishing packages to a registry like NPM, but if you are not interested in publishing your packages, you can skip to the end.
Manage Releases
If you decide to publish your packages to NPM, Nx can help you manage the release process. Release management involves updating the version of your packages, populating a changelog, and publishing the new version to the NPM registry.
First you'll need to define which projects Nx should manage releases for by setting the release.projects property in nx.json:
1{
2  ...
3  "release": {
4    "projects": ["packages/*"]
5  }
6}
7
You'll also need to ensure that each package's package.json file sets "private": false so that Nx can publish them. If you have any packages that you do not want to publish, make sure to set "private": true in their package.json.
Now you're ready to use the nx release command to publish your packages. The first time you run nx release, you need to add the --first-release flag so that Nx doesn't try to find the previous version to compare against. It's also recommended to use the --dry-run flag until you're sure about the results of the nx release command, then you can run it a final time without the --dry-run flag.
To preview your first release, run:
❯
npx nx release --first-release --dry-run
The command will ask you a series of questions and then show you what the results would be. Once you are happy with the results, run it again without the --dry-run flag:
❯
npx nx release --first-release
After this first release, you can remove the --first-release flag and just run nx release --dry-run. There is also a dedicated feature page that goes into more detail about how to use the nx release command.
Next Steps
Here are some things you can dive into next:
- Learn more about the underlying mental model of Nx
- Learn how to migrate your existing project to Nx
- Learn more about Nx release for publishing packages
- Learn about enforcing boundaries between projects
Also, make sure you
- ⭐️ Star us on GitHub to show your support and stay updated on new releases!
- Join the Official Nx Discord Server to ask questions and find out the latest news about Nx.
- Follow Nx on Twitter to stay up to date with Nx news
- Read our Nx blog
- Subscribe to our Youtube channel for demos and Nx insights